How to Choose the Best Windows for Your Home
Nov/04/2026 44How to Choose the Best Windows for Your Home
Replacing the windows in your home is one of the biggest upgrades you will ever make as a homeowner. It is a major financial decision, but it is also one of the few projects that immediately changes how your house looks, feels, and operates every single day.
If your windows are drafty, stuck shut, fogged up between the glass panes, or driving your monthly electric bill through the roof, you already know it is time for a change. But when you start searching for answers, you quickly run into a wall of technical jargon. Numbers like U-Factor and SHGC sound like college physics equations, and every window salesman claims their brand is the only one worth buying.
If you are planning to hire a contractor soon, you do not need a degree in building science. You just need clear, honest facts so you can choose the right products, avoid bad deals, and talk to local installers with total confidence.
Why Window Replacement Is Worth Every Penny
Before looking at frame materials and glass styles, it helps to understand why window replacement pays off so well compared to other home updates.
- Lower Energy Bills: Older, single-pane windows allow indoor heat to escape during the winter and let outdoor heat blast through during the summer. Upgrading to modern double-pane or triple-pane units can cut your heating and cooling expenses by 12% to 15% annually.
- Instant Comfort: You no longer have to sit across the room to avoid a cold breeze during cold months. Quality windows keep indoor temperatures steady right up to the glass edge.
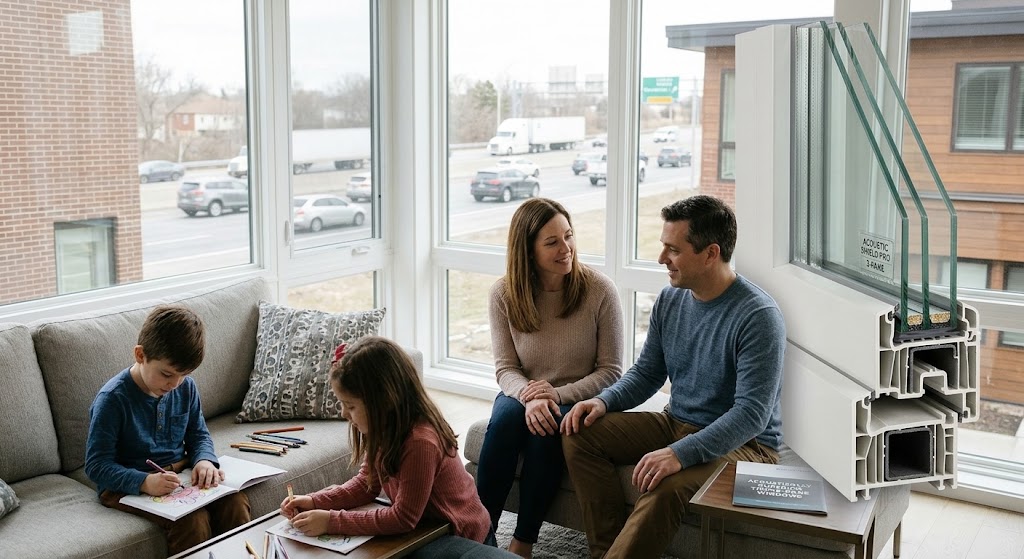
- Quieter Living Spaces: High-efficiency glass units create a heavy barrier against outside noise. If you live near a busy road, a dog-heavy neighborhood, or a noisy school zone, the drop in sound level is noticeable on day one.
- Better Curb Appeal and Value: Modern frames sharpen your home's exterior silhouette. If you decide to sell your house later, replacement windows consistently deliver one of the highest returns on investment (ROI) among home improvements.
Choosing the Right Frame Material
The frame material holds everything together. It shapes how your home looks from the curb, determines how much maintenance you will need to do over the years, and sets the baseline cost of your project.
Vinyl Frames
Vinyl is the most popular choice across North America, and for good reason. It is affordable, highly energy-efficient, and virtually maintenance-free. You never need to paint, stain, or sand vinyl frames. High-grade vinyl includes internal air chambers that trap heat and add structural strength. Their average lifespan ranges from 20 to 40 years.
- Pros: Highly cost-effective, excellent thermal insulation, will not rot or decay.
- Cons: Fewer color options than painted wood; lower-quality vinyl can expand, shrink, or warp in extreme heat swings.
Wood Frames
Wood provides classic beauty that synthetic materials try hard to copy. It offers natural insulation and can be stained or painted any color you want to match your interior trim. When properly maintained, wood frames can easily last 30 to 50 years or longer.
- Pros: Unmatched visual warmth, custom paint colors, high resale value in historic or high-end homes.
- Cons: High initial cost; requires regular repainting and sealing to prevent rot, mold, and water damage.
Fiberglass and Composite Frames
Fiberglass frames are crafted from glass fibers and resin. They are extremely strong, lightweight, and expand at the exact same rate as the glass panes inside them. That means structural seals stay intact longer, reducing seal failure risks and yielding a 30 to 50-year lifespan with minimal effort.
- Pros: Thinner frames with larger glass views, superior durability in extreme climates, low maintenance.
- Cons: Costs more upfront than standard vinyl; fewer budget-tier options available.
Aluminum Frames
Aluminum frames offer unmatched structural strength, allowing for large glass panels and slim profiles over a 20 to 30-year lifespan. However, metal conducts heat very quickly, making plain aluminum a poor insulator unless built with a dedicated thermal break.
- Pros: Sleek modern appearance, high structural strength, great for storm impact zones.
- Cons: Transfers cold and heat quickly unless thermal breaks are built in; can corrode in coastal air.
Understanding Glass Options and Ratings
The glass surface takes up roughly 80% of any window. Choosing the right glass package directly affects how warm or cool your home stays throughout the year.
Double-Pane vs. Triple-Pane
Single-pane windows are outdated and inefficient. Modern home standards require at least double-pane glass—two panes separated by an airtight space filled with dense insulating gas.
- Double-Pane: Features two glass layers and one insulating gap. Excellent balance of efficiency, overall weight, and affordable cost for most climates.
- Triple-Pane: Uses three glass layers and two insulating gaps. It costs 15% to 25% more upfront and weighs more, but offers top-tier noise reduction and keeps homes comfortable in regions with freezing winters or scorching summers.
Argon Gas Fill
Instead of standard air, high-efficiency windows fill the space between glass panes with non-toxic, clear Argon gas. Argon is denser than air, which slows down heat transfer through the glass unit.
Low-E Coatings
Low-Emissivity (Low-E) is an invisible metallic layer applied directly to the glass. It acts like a mirror for thermal energy:
- In Summer: It reflects solar heat back outside, keeping your air conditioning from working overtime.
- In Winter: It bounces interior radiant heat back into your living rooms, reducing your heating load.
- UV Protection: Low-E coatings block harmful ultraviolet rays that fade hardwood floors, rugs, and furniture fabrics.
Decoding Performance Ratings
When looking at window labels, pay attention to these three core numbers certified by the National Fenestration Rating Council (NFRC):
- U-Factor (0.20 to 1.20): Measures how well the window prevents heat from escaping. Lower numbers mean better insulation. Aim for 0.30 or lower in cold climates.
- Solar Heat Gain Coefficient / SHGC (0 to 1): Measures how much solar heat passes through the glass. Lower numbers mean less heat enters. If you live in a hot region, aim for an SHGC below 0.25. If you live up north, a slightly higher SHGC helps warm your house in winter.
- Visible Transmittance / VT (0 to 1): Measures how much natural daylight gets through. Higher numbers mean brighter indoor spaces. Most residential homes prefer a VT between 0.40 and 0.60.
Popular Window Styles for Every Room
The opening style dictates how much ventilation you get, how easy the glass is to wash, and how the window looks from the curb.
Double-Hung Windows
The most common style in classic and suburban homes. Both top and bottom sashes move up and down independently. Modern double-hung sashes tilt inward so you can wash the outside glass from inside your room.
Single-Hung Windows
Similar in appearance to double-hung units, but only the bottom sash moves up and down. The top glass panel stays fixed in place, offering a slightly more budget-friendly price and strong air sealing at the fixed top sash.
Casement Windows
Casement windows connect to their frames by side hinges and crank outward like a door. They offer outstanding ventilation and airtight seals. When wind blows against an open casement, it presses the sash tighter against the frame weatherstripping.
Sliding Windows
Sliding windows glide horizontally along a bottom track. They are common in wide openings, low-clearance walls, and mid-century home designs. They feature a simple mechanical operation with few moving parts, making them durable and easy to use.
Picture Windows
Fixed windows that do not open at all. They exist purely to maximize natural light and offer clear, unobstructed outside views while delivering maximum energy efficiency and zero risk of air leaks around moving joints.
How to Hire the Right Local Contractor
Buying the best windows on the market will not help if they are installed poorly. Faulty installation leads to drafty gaps, water leaks, wall damage, and voided manufacturer warranties.
Step 1: Compare 3 Local Quotes
Never accept the first price estimate you receive. Schedule home visits with at least three reputable local contractors. This gives you a clear baseline for material costs, installation timeframes, and local labor rates.
Step 2: Ask the Right Questions
When meeting with a contractor, ask these direct questions before signing any agreement:
- "Are your installers full-time employees or sub-contractors?" (Factory-trained in-house teams generally offer more consistent installation quality.)
- "Will you perform a full-frame replacement or an insert installation?" (Full-frame replacements address hidden wood rot, while inserts fit inside existing window frames.)
- "What specific warranties cover labor versus materials?" (Glass warranties often come from the manufacturer, while installation warranties come directly from your contractor.)
- "Do your project bids include waste disposal, permits, and trim work?" (Make sure there are no hidden add-on fees after work begins.)
Step 3: Spot Red Flags Early
Be cautious of contractors who rely on aggressive sales tactics, such as:
- High-pressure "today-only" discounts that drop thousands of dollars if you sign immediately.
- Vague verbal estimates without itemized product specifications or written descriptions.
- Demanding full upfront payment in cash before any materials are ordered.
What to Expect During Installation Day
Knowing how installation day works helps you plan ahead and keeps your project moving smoothly.
Before the Crew Arrives
Clear a five-foot workspace inside and outside every window being replaced. Remove curtains, blinds, and window security sensors. Cover nearby furniture with sheet drops to protect against dust.
The Replacement Process
A skilled crew can usually install 8 to 15 standard windows in a single day through five distinct steps:
- Worksite Preparation: The crew sets up floor runners and protective covers around indoor and outdoor work areas.
- Removal & Inspection: They carefully remove old window sashes and trim molding, inspecting the rough opening for hidden water damage or structural issues.
- Setting & Leveling: They set the new window frame, leveling it with shims so it rests plumb and square.
- Sealing & Insulation: They apply low-expansion insulating foam into gaps around the frame to stop air leaks, adding exterior flashing to stop rain penetration.
- Final Inspection: They complete trim capping, test sash operation, clean up debris, and walk through the work with you.
The Final Inspection Walkthrough
Before your installation crew leaves, walk around your home with the project supervisor. Open and close every sash, check locking mechanisms, verify screen fits, and confirm that all jobsite debris has been cleared away.
Ready for Your Home Upgrade?
Upgrading your home's windows is a smart long-term investment. By matching the right frame material to your home's style and selecting energy-efficient glass built for your local climate, you will enjoy a quieter, warmer, and more valuable house for decades to come.
Take the next step today: reach out to trusted local pros, compare itemized estimates, and get your project underway!